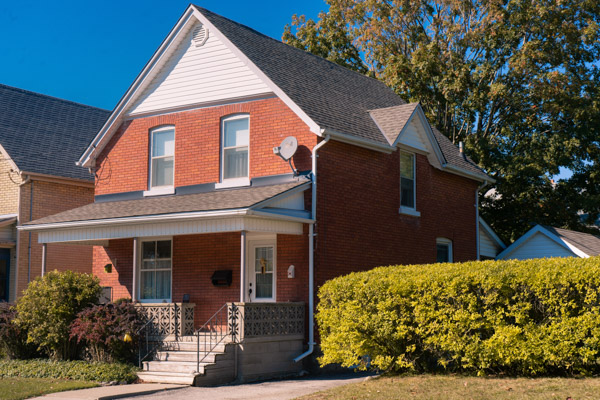
Today we discuss the ins and outs of removing a brick chimney from your existing roof deck. What should a chimney removal cost? How is it done? Will my roof be strong where the chimney was removed?
Removing a chimney that is no longer in use is a great way to remove any extra potential problem areas and add curb appeal to your home. Additionally, when you go to sell your home, it is one less thing your buyers will have to worry about, increasing your selling power. Chimney removal is best to do when you’re replacing your entire roofing system, that is the best time to tackle this project. That being said it can also be done without changing the whole roofing system, and I have done many of these as well. It’s just better if you’re having a new roof replacement to remove it then. Tying in shingles or steel is never an ideal situation but it can be done without any leaking issues. Another thing to remember when only repairing the shingles or steel in one small area is that the colours may not always be a perfect match. The sun will always remove colour from any product over time.

This is a chimney we removed a couple of weeks ago, this chimney was no longer in use and the property owner had replaced their heating with a gas fireplace.

We started by removing all the shingles from the roof from around the chimney, this was a complete roof replacement. The flashing around the chimney should be removed before you start removing the brick. We always remove one brick at a time and have two workers remove the bricks, in this case it was blocks. It’s always easier to have two people available to remove the chimney, the top cap will always be the heaviest part and depending on how it comes apart, help is always nice.

Once the chimney is removed its time to fill in the hole. I always use 2×4’s and frame them right into the existing roof deck. I use screws to ensure the strongest integrity for the roof deck. When you start framing in your chimney area you have to be sure that you account for the thickness of plywood you’re using. Be sure to set the 2×4’s lower than the roof deck by the same thickness of your plywood. For example half inch ply, framing should be set a half inch below the roof deck.
This is a very important step because if your framing is too low, you will see a sag in your roof. If it is too high your will see a protrusion in the spot your chimney use to be. You want it look as if there was nothing ever there, so take the time to make sure your framing is level and set at the right distance.

Now we applied our plywood to our framing, again I always use screws when installing the plywood. I always use screws anywhere I can when building anything, they are stronger and less chance of nails popping out over time. I use 2″ and 3″ deck screws for all chimney removal.
Here you can see the plywood is level and strong. I always like doing a test by walking over the framing and feeling the strength below my step in the roof deck. After this plywood was installed we did a final clean up around the existing hole before we started applying our underlayment.
Note: The black product around the chimney is a self ad-heard membrane that seals to the roof deck around potential problem areas. There are many different manufactures of this product and each manufacturer puts their own name on it. It’s most commonly referred to as “ice and water shield”. Its important to apply this self ad-heard membrane (ice and water shield) when only repairing the spot, but when removing a chimney during a complete roof replacement, your synthetic or polypropylene underlayment will do just fine.

With the roof deck repaired and underlayment installed we you can go ahead and apply what ever roofing product you are using, or matching to your repair. The roof deck is flat, structural strong and the chimney removed. Now it’s time to pick up your hammer and your ladder and start your own chimney removal.
How much should it cost if I hire a Roofing Contractor?
No two chimney removal is the same, therefore its tough to put an exact figure on what it will cost, but I will give you a rough figure and discuss what decides the price.
- The pitch of your roof. The steeper your roof is the more it’s going to cost for any chimney removal. Roofing is not an easy task and removing bricks and blocks from a very steep roof down to the ground safely without causing damage takes time and hard work. Time + Hard Work = $$
- Access to the chimney on a steep roof. If your chimney is closer to the eaves its going to cost less than if it’s at the peak of the roof. This will only apply to steep roofs. On a low slope roof, like the one i showed you here, it doesn’t cost more being at the top of the roof because we were able to walk on the roof. If your roof is steep and the chimney is at the top of the roof, it will cost more because its difficult and time consuming, Time + Hard Work = $$
- How many storeys is your roof? one, or two, or three? The higher the roof is from the ground the higher the cost will be for chimney removal. i think we’re starting to see a trend here, the more difficult the work, the more it will cost.
So now you know what we look at when we price a chimney removal, we look up and we know from experience if this is going to be very difficult or a piece of cake. In the case above we discussed today I charged the property owner $250.00 to remove the chimney. I had lowered my price because I was doing the roof as well, if I wasn’t doing the roof I would charge $350-$400 for this chimney removal. (prices in Canadian dollars)
To give you an idea, for what I would charge for a very difficult chimney removal: 2 storey, chimney at the top of the roof, steep pitch, and the chimney is 4′ tall, $800.00 – $1000.00. Now thats my pricing, I cant speak for other contractors, but I always suggest property owners get 3 quotes. This will give you an idea of the going rate and what is the low-high end costs. I can’t stress this tip enough, be sure that the contractor you hire follows all local worker insurance laws. Always be sure if something happens you are protected. Its the responsibility of your contractor to carry all worker insurance while working on your home, and that discussion is a whole other post… As always if you’re in Southwestern Ontario and require any roofing needs, contact us and our team of experts will be ready to assist you. 519 207 2995

